Once your Zendesk for Contact Center instance has been created by Zendesk, they will provide you with a CloudFormation template URL. You will use this to quickly install the CloudFormation stack to link your Amazon Connect instance to your Zendesk for Contact Center instance.
Installing the Zendesk for Contact Center CloudFormation stack
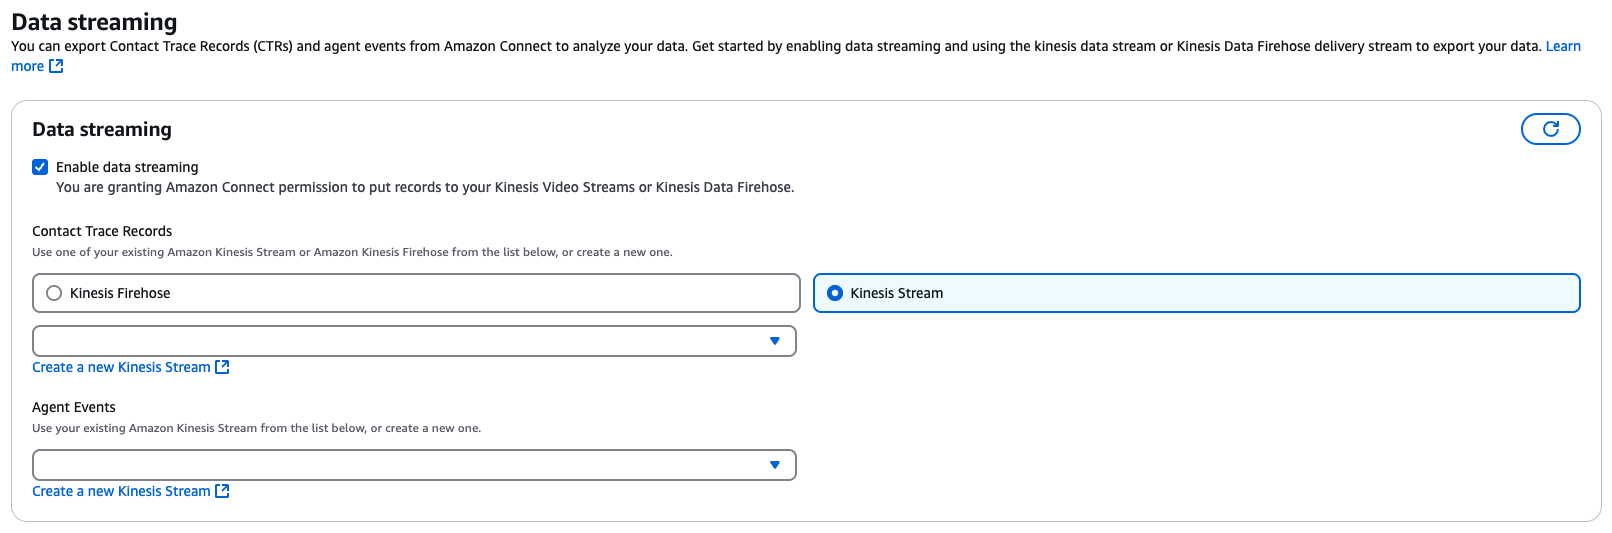
Before running the Stack deployment, ensure that Kinesis Data Streaming is enabled (“Kinesis Stream” and NOT “Kinesis Firehose”) for the Amazon Connect instance connected to the deployment.
- After receiving the CloudFormation template URL from Zendesk, open your Amazon Console in the correct region where your Amazon Connect instance resides.
- You will be shown a page of all the details about the Stack being installed.
- You can navigate to the bottom of the page and accept the terms before choosing to launch the stack installation.
- Deploying the Stack can take up to 15 minutes to complete, at which point it will say “CREATE_COMPLETE” next to the new stack in Amazon Console.

- After the Stack has completed in the Amazon Console, you will be required to inform the Zendesk team who created the Contact Center instance to inform them the stack has been installed successfully.
- The Zendesk team will then activate the Stack from their end to link the Zendesk for Contact Center instance to your Amazon Connect instance.
- After the stack has been activated, your should be able to log into the Zendesk for Contact Center instance using the login method set up in Amazon Connect.
- Next step will be to install the Zendesk for Contact Center app in Zendesk and link it to your Contact Center instance.